These are a work in progress while we prepare to launch our latest easel, the Snapsel.
These instructions are for if you purchased the DIY version of the Snapsel. The kit comes with everything you need to assemble the easel except for CA Glue (“Superglue”). We do not include this because you don’t need very much, is available locally and cheaply in most countries we ship to, and avoids shipping concerns.
First, organize the printed parts:

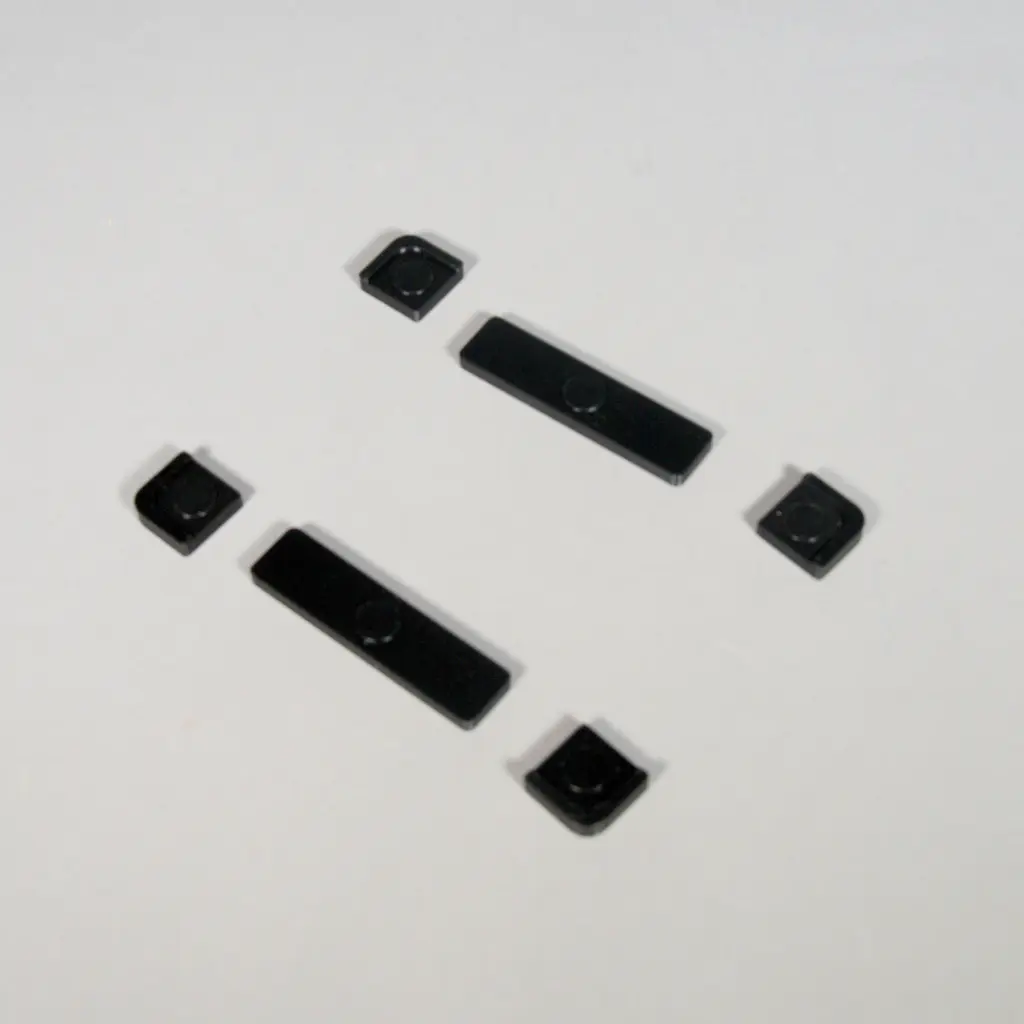
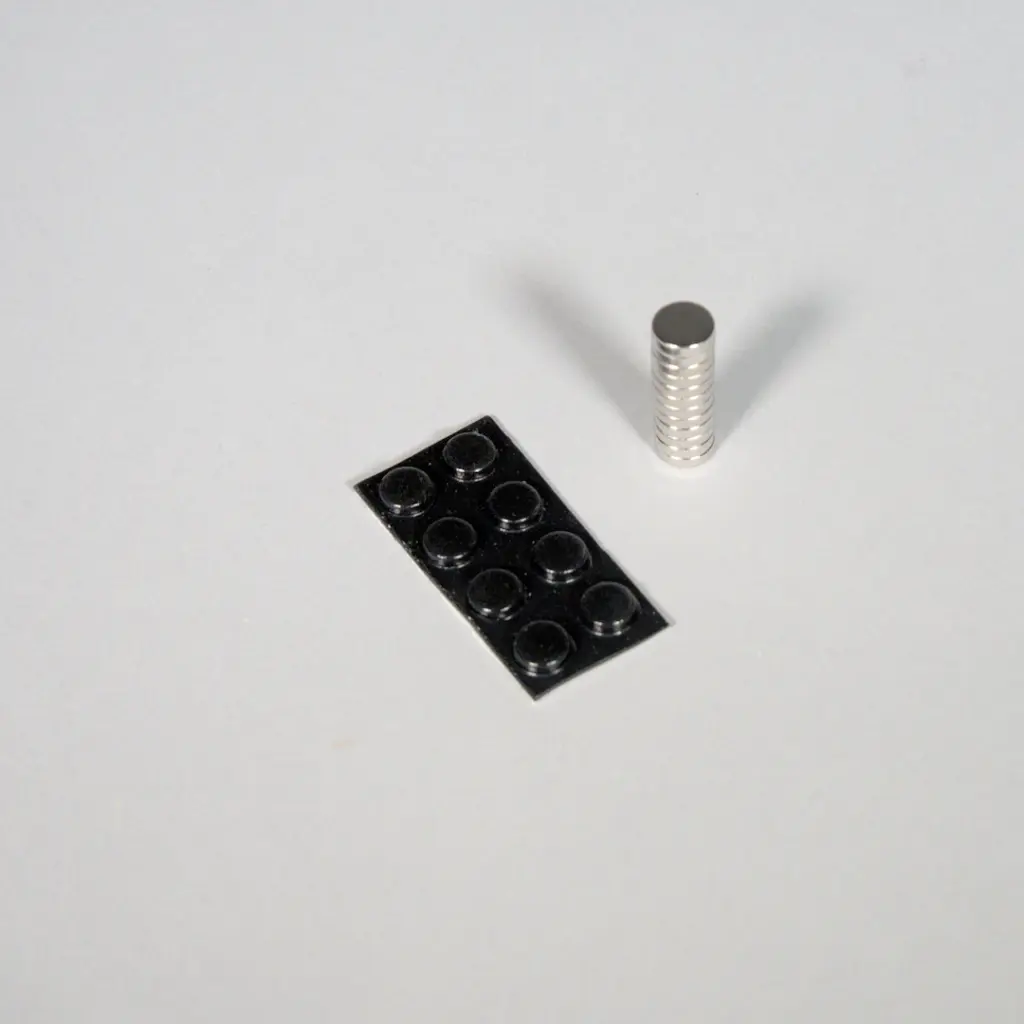
The left-most image is the 3D printed parts for the base; the center is the printed parts for the top; and the right-most is the magnets and anti-slip feet.
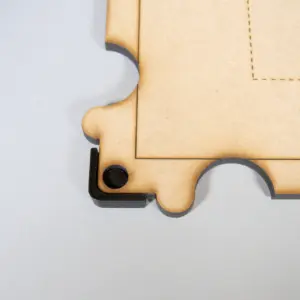
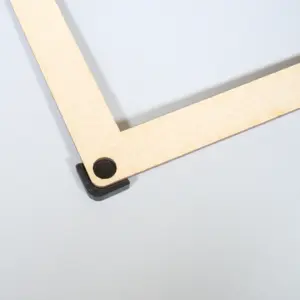
Start with the easel facing up (meaning the letters and markings are visible). Install the corner tabs of the base. These are pushed into the base from the bottom up with the cylinder running up into the hole for the magnet. It is recommended to practice without glue first. When you are ready to do it “for real”, apply a small amount of glue in the gap around the cylinder. Avoid placing glue on the cylinder itself as we are just wanting to glue the tabs in place first. With the glue on the plastic part, place it into the corner and push up, making sure it is inserted fully and there is no gap between the part and the wood. Hold it there for a few seconds. Repeat for the corners. Then repeat for the center tabs.
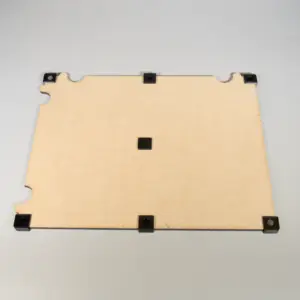
For the center tab, flip the easel over. If you want to be precise, find the centerpoint of the easel in both the width and height using a tape measure. Note that this doesn’t have to be exact, so if you prefer to eyeball it, that’s probably fine. This is mostly for adding a bit of rigidity and anti-slip to the easel. It’s not strictly required (and for some of the smaller easels, isn’t even included). So “good enough” is fine here if you don’t feel like measuring stuff. For the center tab, simply put a dab of glue on it and then press it onto the bottom of the base and hold it there for a few seconds. Flip the base over and apply the anti-slip feet. They simply peel off and stick on. Press them onto the bottoms of the tabs firmly for a few seconds. Flip the base back over (so it is resting on the feet you just installed).
While the bottom tabs are drying, let’s switch over to the top. The top parts work in similar fashion to the bottom though the cylinder is much shorter and the parts themselves are thinner. So they require a bit more attention though work the same way. With the top facing up (meaning you can see the lettering), place the tabs cylinder side down so they “lock” into place. As before, practice this before gluing. Note that the center tabs have to be aligned manually.
When you’re ready to glue, flip the top over so that it is face down. This is so the glue is always “face up” so there is less of a chance that it will drip. For the corner tabs, apply glue around the cylinder (but not on it) and press it into place from the bottom and press firmly. For the center, do the same thing but be sure to add glue for the sides. A thin line should be sufficient. When you press it in place, be aware to also align it so it it parallel with the edge of the top.
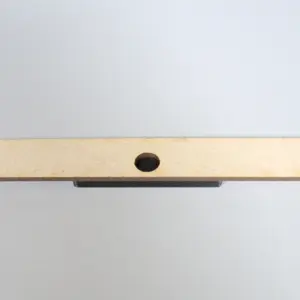
Usually at this point, the base glue is dry enough to proceed to installing the magnets. Put the base face up. Now find the stack of magnets. It doesn’t matter which end you start with, just be sure to install all the magnets in the same direction. So once you pick a side, stick with it. Place a dab of glue into one of the magnet holes in the easel. Then slide one of the magnets off the stack, and making sure now to flip it over, place it into the hole and press firmly for about 10 seconds or so. Repeat for each of the holes.
For the top, flip it over so it is face down exposing the magnet holes. Take your stack of magnets and flip it. If you lost track of the orientation, one easy way to figure it out is to take the stack and hold it near one of the magnets you glued down to the base. With the base face up, the magnets should repel each other. This because we’re installing the magnets with the top face down. When we flip it over, they will be in the correct orientation.
As with the bottom, place a dab of glue into a hole, slide a magnet off the stack (making sure not to flip it) and firmly press it into the hole, holding it there for about 10 seconds.
After a few minutes, the glue should be hardened enough you can probably start using the easel, though it is best to let everything sit for a few hours. This is primarily for the magnets. If the glue doesn’t set well enough, or there wasn’t enough glue used, they can pop out. If that does happen, they can be reglued back in place. Just be sure to get the orientation right (you can hold it over another one of the magnets to check the polarity).