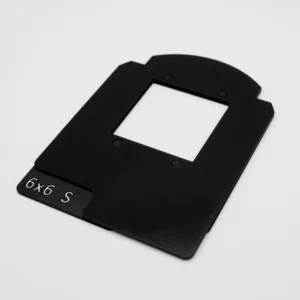
A while ago I created a number of carriers for Joe who runs the subclub.org website to cover a few of the cameras that use 16mm film. Recently I made another one for him and realized I never got around to adding these formats to our listings! While we work on that, I did want to let folks know that we can make several carriers for the 16mm format, including:
Super Minolta
HIT
Kiev 30
110
16mm
Minox
That last one isn’t 16mm, but thought I would make mention of it. Also the “16mm” version is, according to Joe, the one many of the 16mm cameras used and is sort of the “normal” option. Note also that we currently only offer these in our Standard (full-masked) gate size.
Also one thing I haven’t gotten around to (until today) is to actually put all our gate sizes and measurements in one place. I’ve begun to remedy that and have added a film gate size page linked off our instructions which includes all the sizes above as well as most of the gate sizes we offer. It’s still missing a few, but I’ll be working to add those soon. Of course, we can do custom gate sizes too if your camera or format isn’t listed.
If you haven’t checked out The Sub Club I do recommend it! Joe is quite passionate and knowledge about the Sub-35 formats. I learned quite a bit both from Joe directly and from his website and think it’s well worth a look! Huge thanks to Joe for linking to us too and for showing me that there’s more to 16mm than just movie cameras!
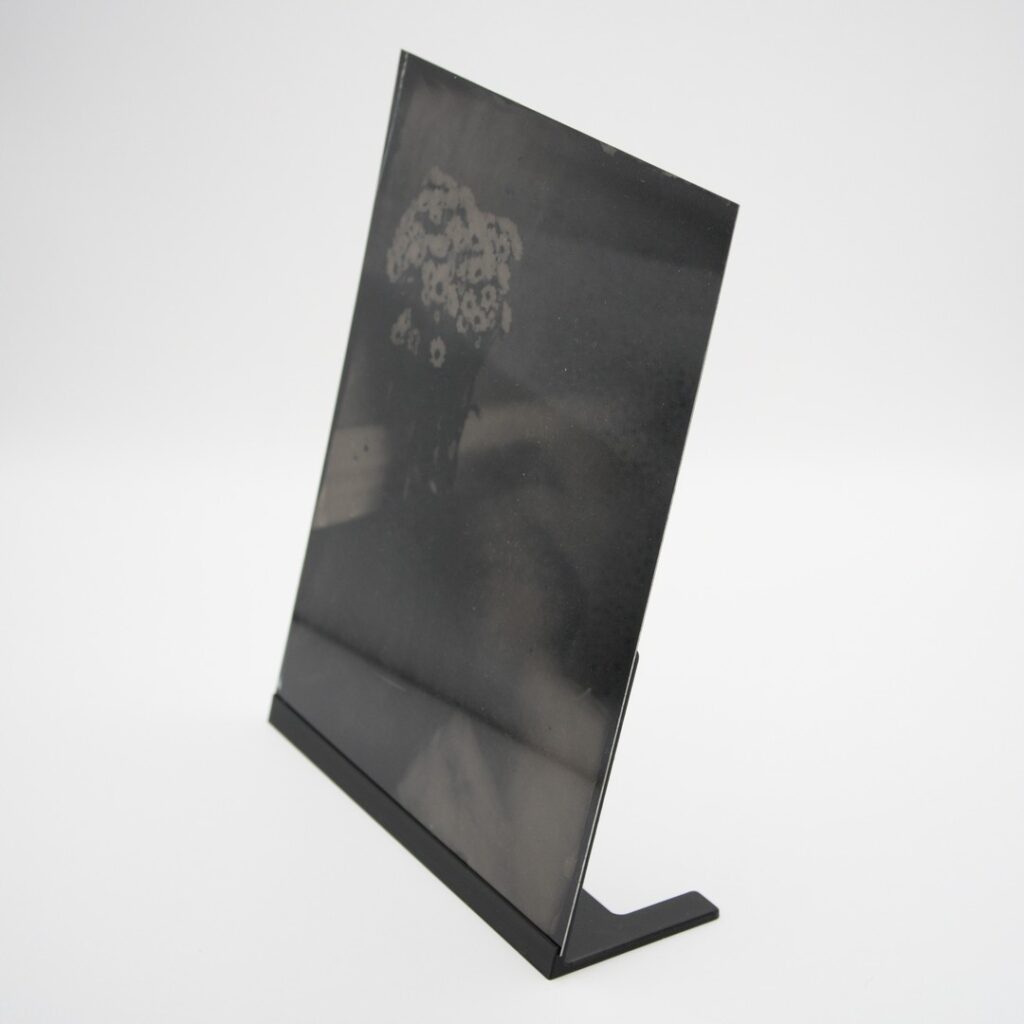
At long last, the 7.5×9.5 tintype stand is now available! Derek Keaton was extremely helpful to allow me to use some of his plates for the measurement and design.
Tintype made by Derek Keaton
I know several folks have been waiting for those. Some of you might be wondering why 7.5 and not 8? That was simply because that is what Derek uses, as do many folks. I do plan on an 8×10 version as well, though would much prefer to have a tintype on hand to borrow for validating the measurements. This stand will work for 8×10, the tintype will just stick out over the edges of the frame by a little bit. Likewise it can work for landscape with the same caveat.
I changed the design as compared to the 4×5 and 5×7 stands. I quite like those designs and I think they work well, but for the larger sizes, I needed something that could support the much larger plate while not consuming a huge amount of plastic and opted to go with the design that you see.
I hope folks enjoy these! They are available on the shop for purchase as a set of two.
It’s taken me a while, but I’m happy to announce some updates to our carrier lineup, starting with the C760. Finally! I’ve been hard at work trying to perfect multi-material printing and improve the quality of our products as a whole.
Some customers have already seen this with our newer camera scanning tables. The bottoms now have a TPU anti-slip skirt. This has been working well and I like it much more than the adhesive cork we were using. Ironically I would have expected that to have been more complicated than colored printing but that turned out not to be the case. In fact folks may remember I teased an early Omega D2 carrier a while ago. I’ve been working on it since that time.
After lots of work and with help from the truly amazing folks at both Prusa and Push Plastic, I’m proud to say we now have colored engraving/infill! For now the white engraving option is exclusive to our direct store (other colors may follow depending on interest), the C760, and is a small value-add. We hope to eventually offer colored infill as an included preference though this will require further upgrades to our print farm to do so and until we do are making it more of a premium option.
We will be adding this option to our other carriers soon and will also add this as an option on our eBay and Etsy stores as well at some point in the future.
I’m very excited, if you couldn’t tell! Thanks to all our customers for your continued support and encouragement! As a teeny tiny two person business (just me and Mrs. BitByBit Photo and on rare occasions the kiddo when he needs extra money), it really means the world. Our goal has been to be a positive force for good in the growing world of analog photography above all else.
(Those wondering about the Epson carriers – worry not, I’m still hard at work on those too!)
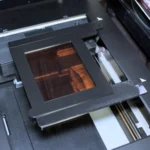
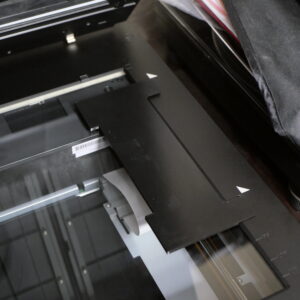
There still more to do, but I’ve made and tested the first functional prototype Epson V-series carrier for 4×5 film!
The focus is surprisingly pretty close for my scanner though I need to make the bottom half both a smidge taller and the inlay a smidge deeper. I have been looking for ways to adjust focus, one being nylon screws. I haven’t found a reasonable cost effective screw size for that yet and actually someone on Activity Pub pointed out that they simply use tape for their homemade carriers. Simple and effective such that I will probably test that approach for these.
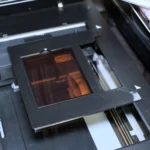
At first I wasn’t happy with having to use a film inlay instead of posts like a conventional darkroom carrier, but having done it this way, I actually rather like it! To the point I wonder about perhaps using a similar design for some of the thicker negative carriers (like the Omega D2).
Even better still, using an inlay means it should be possible to use ANR glass on the topside. I don’t plan on making a full glass solution but having the glass on top will help press some curlier films down. Something that may prove very helpful for 120. And on the note of 120, one design option I am looking at is an edge to edge inlay. This means longer strips of film can be used than what the original Epson scanners could accommodate. I haven’t even started the 120 design yet so we’ll see how that shakes out once I get there.
Overall I’m really happy with the design so far! A few tweaks and I’ll at least be switching to this for me own scanning. The thumb notch for being able to easily pick the sheet up alone is a near game changer for me!
This is the first part of a multi-part series (maybe) on a product I have been wanting to make for a long time. With all the film I’ve been scanning from our Iceland trip, it seemed like a good time to tackle this as it has been on my radar for some time.
It might not look like much, but it is the first large-ish test print for what I hope to become a film carrier system for the Epson V-series scanners.
To make one point clear right out the gate, I do not want nor intend on competing at the high end. BetterScanning, for instance, makes some incredible flatbed scanning solutions complete with the ability to do wet-mount and with a precision focus system.
Instead I am looking at having something perhaps in between the Epson OEM trays and BetterScanning. I may have an option for top ANR glass (be it true ANR glass or museum glass) but these will otherwise behave similarly to my darkroom and camera scanning carriers. One difference between those and the Epson may be that I may have to settle for using an inlay. I had wanted the bottom piece to be entirely flat but because I also want to use the mounting holes on the Epson flatbed, I need to work around geometry while also keeping the negative in the focus zone.
A lot more testing needs to be done still. I said this might be a multi-part series because I’m not yet sure if this will end up turning into a real product or not. Too soon to say though my initial work has been fairly promising. If you are interested in something like this, please let us know! We love to hear from our customers, especially when it comes to products we think might be helpful to the growing film community!
As some of you may know, we’re going on vacation to Iceland coming up here soon. As part of my (over) preparation, I decided to upgrade and add to my filter collection. As an aside I’ve made quite a few accessories for the trip, some of which I have already teased which includes some circular and rectangular filter cases which I’m rather fond of.
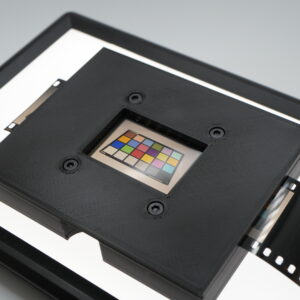
Anyways! Among the filters I decided to pick up were Hoya X0 (light green) and X1 (green) filters. I’ve never used green filters but it seemed like something worth trying going to a country with lots of green things. My main black and white film will be T-Max 100 so I decided to use one of my recently expired rolls of TMX in 120. This also let me test a new film back for my Hasselblad while doing so. The test was simply taking photos of my color chart on our outdoor seat during the mid afternoon on a cloudy day. I metered on the middle grey patch of the color chart which matched the incident reading as well. Here are the results:
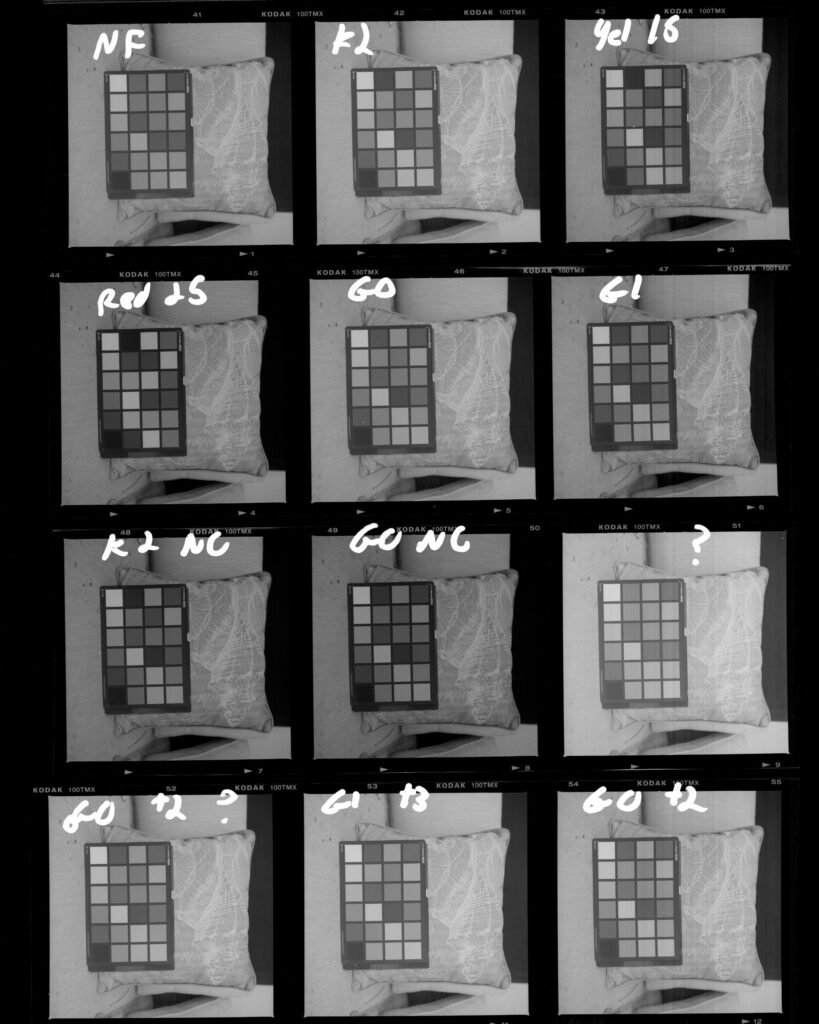
Here’s a flatbed scan of the PrintFile sleeves of the film I shot. So it’s not the sharpest but the goal here was to just compare the color swatches to my X-Rite Color Chart. The exposures go left to right and down and are as follows:
1: No filter
2: Hoya K2 Yellow
3: Tiffen Yel 15 (more of an orange)
4: Tiffen Red 25
5: Hoya X0 (light green)
6: Hoya X1 (green)
7: K2 without any exposure compensation (so same shutter speed as shot 1)
8: G0 without any exposure compensation (so same shutter speed as shot 1)
9: Pretty sure I messed up my aperture setting on this one
10: X0 with +2 exposure, though also messed up my aperture
11: X1 with +3 exposure
12: X0 with +2 exposure
I developed this roll in Zone Imaging’s 510-Pyro (which by the way we do carry on the store!) at 1:100 for 12:30 with 404ml working solution in my DIY rotary. I don’t think that plays a huge role here but 510 is likely the developer I will be using to develop most of my black and white films from the trip.
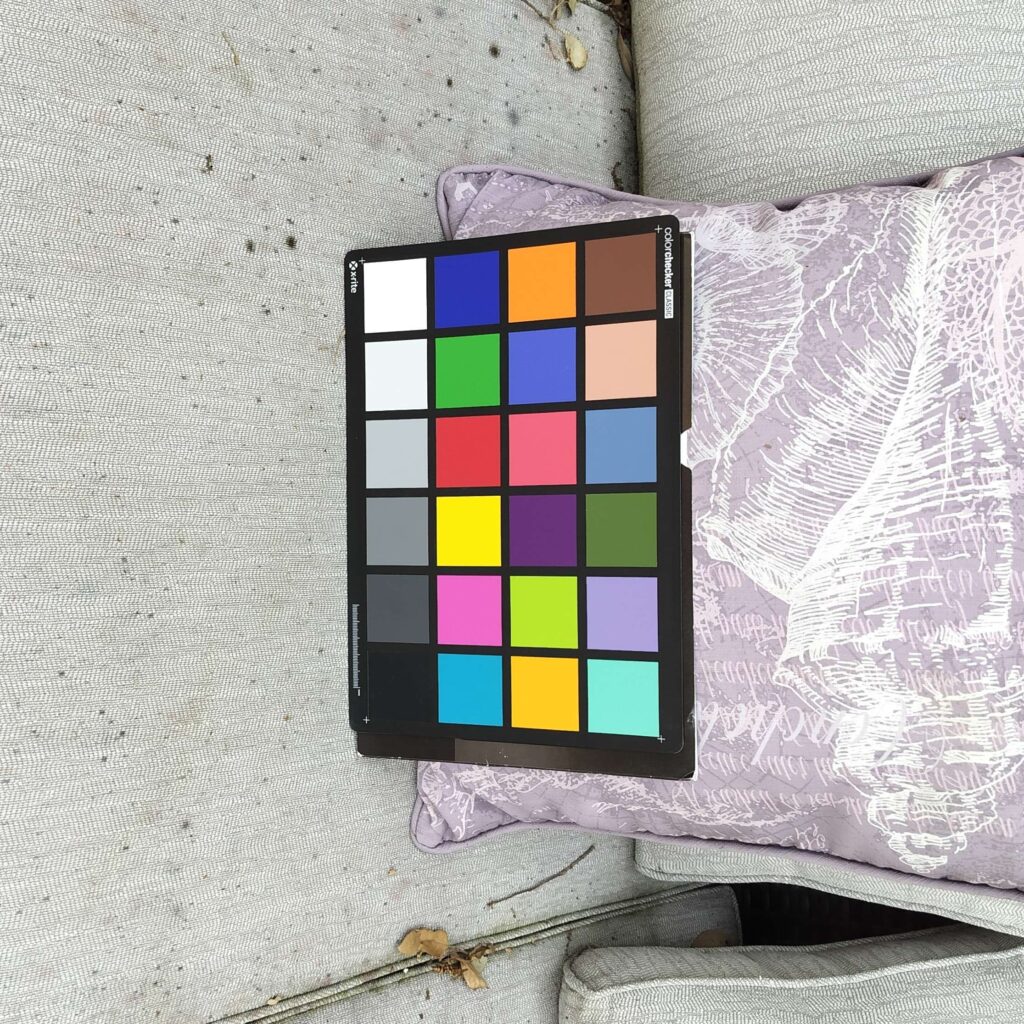
As an aside, Mrs. BitByBit Photo gives me a hard time to this day about how much that color chart cost for what amounts to color dyes on plastic. But nonetheless, it gives a good sampling of lots of colors I might see in the field. I’ll admit though a color chart won’t necessarily tell the whole story. Either way, here is what it actually looks like (taken from my phone):
So far my initial conclusions are that the X0 and X1 seem fairly similar to the yellow filters though are less steep on the light blue shades. I expected a bit bigger of a difference, and that may be the case with other films perhaps. I was surprised to see how much of a difference there was with the K2 filter. I often see TMX mentioned as having a “built-in yellow filter” and while I actually also tend to agree, it’s probably very mild or at least shows that the K2 still has a noticeable effect compared to no filter. This was actually the main reason I decided to do this test and I’m glad I did as that was somewhat unexpected.
From an exposure compensation perspective, I think the exposure compensation provided by Hoya and Tiffen is pretty spot on. Noting I used whole stops here and rounded to the nearest slower shutter speed for values in the middle. I do think the Red filter could use a bit more exposure based on the above though. Not by much, but by a little. I used my (recently CLA’d) Hasselblad with 80mm lens for these tests so there could also be some mechanical tolerances going on here, though that’s what I would experience in the field anyway and not something I wanted to worry about here.
I had already planned to bring all these filters and if I have a chance where I feel like I can burn some film on a particular scene, I might re-run these tests out in the field with a real subject just to see what comes of it. All told, part of the reason I got the K2 and X0 filters was for being able to double as protection filters, noting the unpredictable weather (including rain and wind) that I may experience while up there.
So there you go! Not particularly scientific but I learned something there and perhaps you did too!
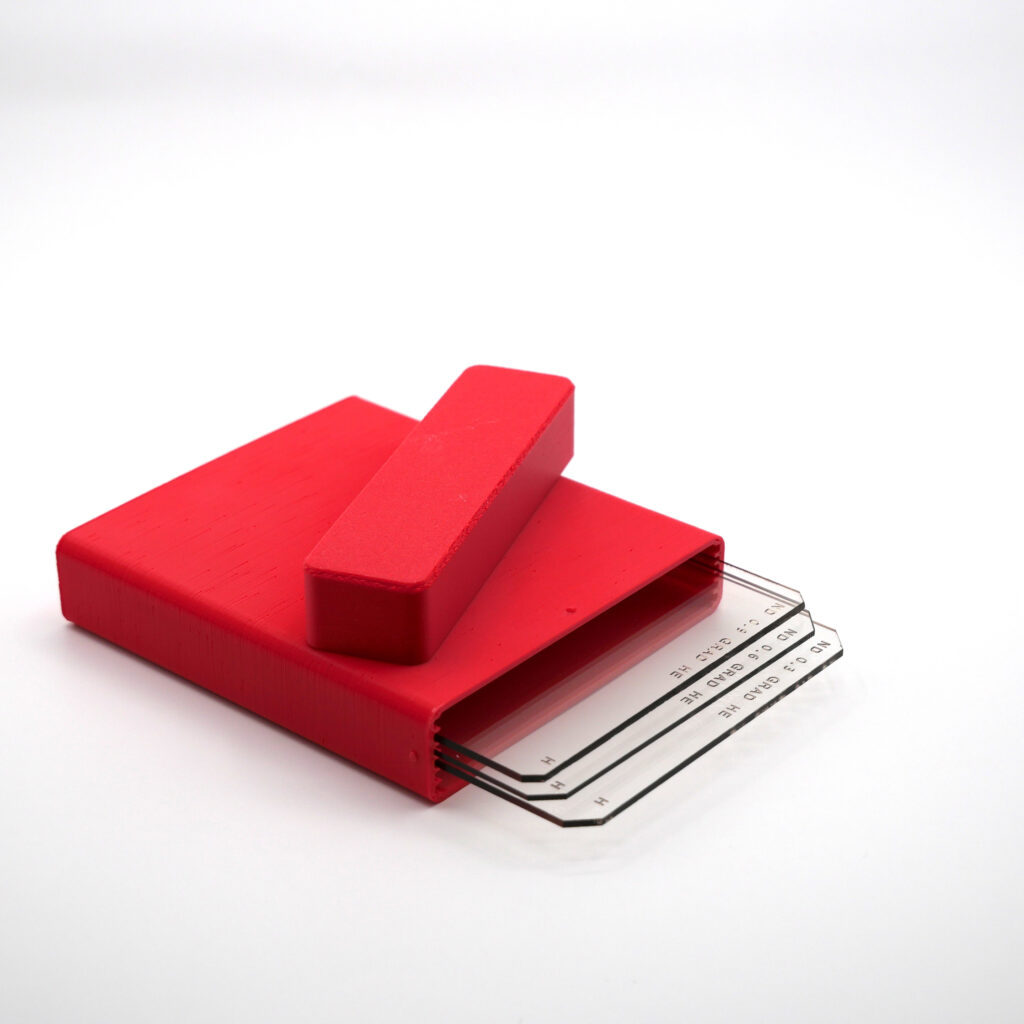
Another random case for our upcoming trip to Iceland! This is a 6 slot graduated neutral density filter case. The cloth pockets I have for these work “fine” but I actually don’t like something rubbing against the image area of the filter. If there’s dust on the cloth, it’ll just spend time sparing the dust bits around possibly scratching the fragile resin filter.
So instead, this only grips the filters on the sides in the same spot as the actual holder used by the camera. Since that’s outside the image area I don’t have to really worry about it nearly so much. The rigid plastic also helps provide some protection from some other random stuff in my pack.
This is not the final design but it’s not too far off. I think I want top to slide over the bottom a bit like the Omega gel filter storage box I made a while back. That will look nicer and also have a place for the top to stop to avoid pushing against the filters.
The final version will also be printed in an opaque plastic to protect the filters from light fade. The box will spend most of it’s time in my 4×5 backpack but even so. I had been thinking about upgrading one of the filters (the 2 or 3-stop) to glass as well but we’ll see.
Dunno if I’ll make this an official product or not but if folks are interested in something like this, certainly let me know!
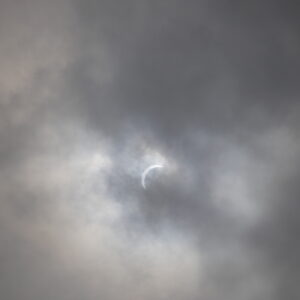
Some of you probably noticed our website was down for the last few days right on through the eclipse! We’d like to call it a side effect of the eclipse but now it was mostly my fault.
A cloudy view of the eclipse which, sadly, was the best direct view we had.
In any case, we’re working on making that better! I had a long explanation but figured most of our customers probably don’t care to read about how we run or websites – folks just want them to be up! My personal philosophy is most things on the Internet can go down every now and again and that should be fine. That includes our websites. But “every now and again” should be minutes maybe even hours but certainly not days! My apologies! We’ll do our best to make sure that doesn’t happen again.
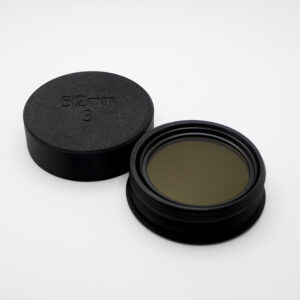
Folks that have been keeping an eye on our socials may have noticed I’ve been working on screw together filter cases as a means to have a simple and lightweight rigid option for both storing and traveling with filters. Though I still plan to have more sizes and colors, I decided to release the product out for the sizes and materials I currently have available.
Currently available for 55 and 67mm filters which can accommodate 3 or 4 filters. I’ve tested these personally with Hoya and Tiffen filters. Most should work but some there are some brands which may be thicker. If in doubt just reach out to us!
I’ve got more designs coming, including hopefully a Reveni light meter holder for Hasselblads, large format lens caps, lens cases, more carriers, lots of things! But I’ve been wanted to design these cases for a while, in part because I need them when I’m traveling for my own needs, and thought it’d be good to share these out.
Thanks to our new Prusa XL, I can now print multi-material. This means I can make the bottom anti-slip gaskets without having to use the stick on laser cut cork. It not only seems to work better but looks much better and lets me make some further adjustments to the geometry. Some folks that have open scanning table orders will be getting to new version and I’ll be updating all our listings on our direct store as well as eBay and Etsy this week to reflect the change. Price will remain the same.