Posted on

Film Carriers for Epson V-Series Scanners, Part 2

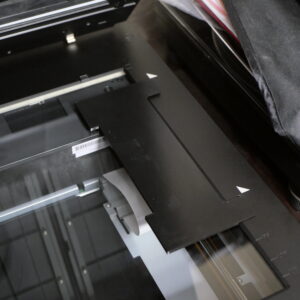
There still more to do, but I’ve made and tested the first functional prototype Epson V-series carrier for 4×5 film!

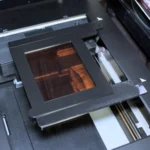
The focus is surprisingly pretty close for my scanner though I need to make the bottom half both a smidge taller and the inlay a smidge deeper. I have been looking for ways to adjust focus, one being nylon screws. I haven’t found a reasonable cost effective screw size for that yet and actually someone on Activity Pub pointed out that they simply use tape for their homemade carriers. Simple and effective such that I will probably test that approach for these.

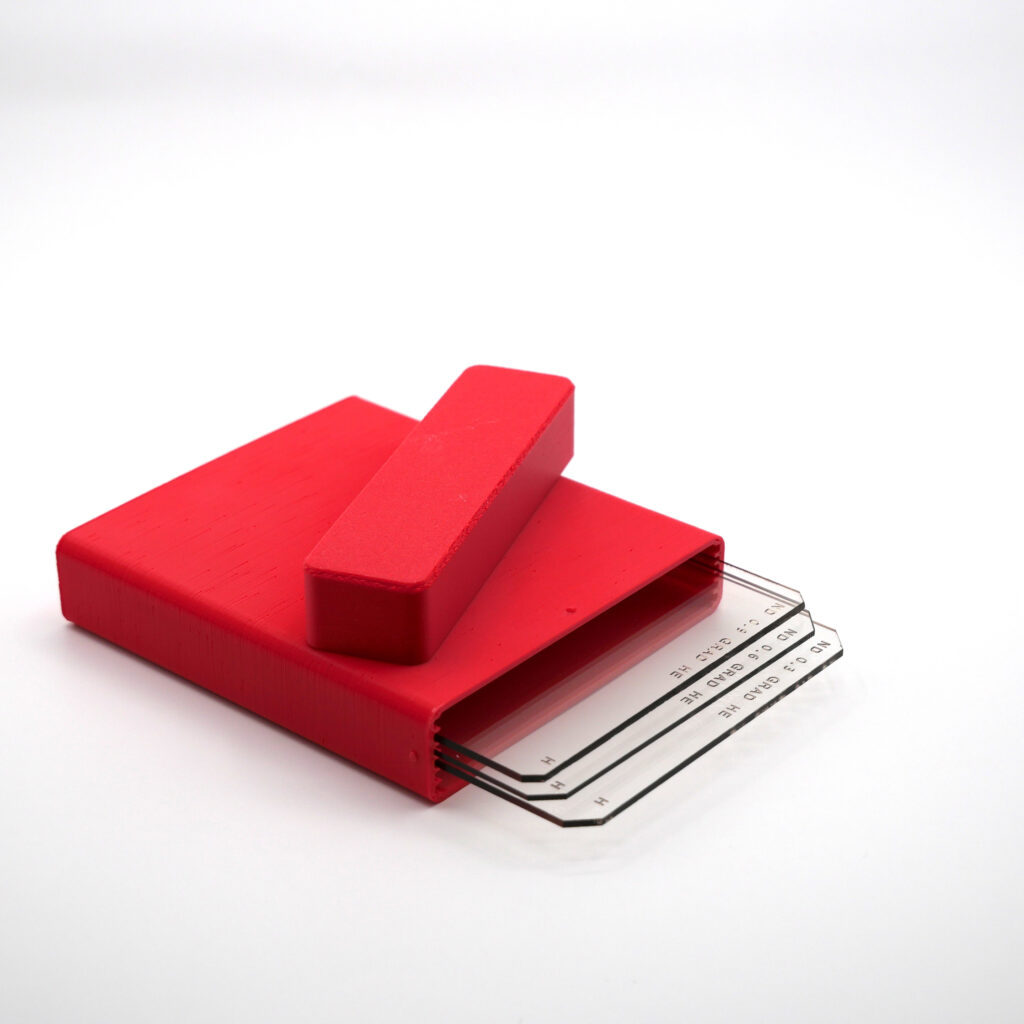
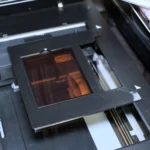
At first I wasn’t happy with having to use a film inlay instead of posts like a conventional darkroom carrier, but having done it this way, I actually rather like it! To the point I wonder about perhaps using a similar design for some of the thicker negative carriers (like the Omega D2).

Even better still, using an inlay means it should be possible to use ANR glass on the topside. I don’t plan on making a full glass solution but having the glass on top will help press some curlier films down. Something that may prove very helpful for 120. And on the note of 120, one design option I am looking at is an edge to edge inlay. This means longer strips of film can be used than what the original Epson scanners could accommodate. I haven’t even started the 120 design yet so we’ll see how that shakes out once I get there.

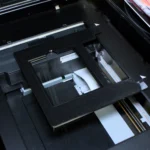
Overall I’m really happy with the design so far! A few tweaks and I’ll at least be switching to this for me own scanning. The thumb notch for being able to easily pick the sheet up alone is a near game changer for me!

Posted on

Film Carriers for Epson V-Series Scanners, Part 1

This is the first part of a multi-part series (maybe) on a product I have been wanting to make for a long time. With all the film I’ve been scanning from our Iceland trip, it seemed like a good time to tackle this as it has been on my radar for some time.

It might not look like much, but it is the first large-ish test print for what I hope to become a film carrier system for the Epson V-series scanners.

To make one point clear right out the gate, I do not want nor intend on competing at the high end. BetterScanning, for instance, makes some incredible flatbed scanning solutions complete with the ability to do wet-mount and with a precision focus system.

Instead I am looking at having something perhaps in between the Epson OEM trays and BetterScanning. I may have an option for top ANR glass (be it true ANR glass or museum glass) but these will otherwise behave similarly to my darkroom and camera scanning carriers. One difference between those and the Epson may be that I may have to settle for using an inlay. I had wanted the bottom piece to be entirely flat but because I also want to use the mounting holes on the Epson flatbed, I need to work around geometry while also keeping the negative in the focus zone.

A lot more testing needs to be done still. I said this might be a multi-part series because I’m not yet sure if this will end up turning into a real product or not. Too soon to say though my initial work has been fairly promising. If you are interested in something like this, please let us know! We love to hear from our customers, especially when it comes to products we think might be helpful to the growing film community!

Posted on

Resin Rectangular Filter Box

Another random case for our upcoming trip to Iceland! This is a 6 slot graduated neutral density filter case. The cloth pockets I have for these work “fine” but I actually don’t like something rubbing against the image area of the filter. If there’s dust on the cloth, it’ll just spend time sparing the dust bits around possibly scratching the fragile resin filter.

So instead, this only grips the filters on the sides in the same spot as the actual holder used by the camera. Since that’s outside the image area I don’t have to really worry about it nearly so much. The rigid plastic also helps provide some protection from some other random stuff in my pack.

This is not the final design but it’s not too far off. I think I want top to slide over the bottom a bit like the Omega gel filter storage box I made a while back. That will look nicer and also have a place for the top to stop to avoid pushing against the filters.

The final version will also be printed in an opaque plastic to protect the filters from light fade. The box will spend most of it’s time in my 4×5 backpack but even so. I had been thinking about upgrading one of the filters (the 2 or 3-stop) to glass as well but we’ll see.

Dunno if I’ll make this an official product or not but if folks are interested in something like this, certainly let me know!

Posted on

Another Update to the 8×10 Drying Rack

This might be the one, though I think I said that last time… I’ve been wanting to work on this for a while but between travel, getting orders out the door, and the incredible heat here, I haven’t been shooting much 8×10 and that’s put this a bit on the back burner. The last prototype worked well, but I did feel the sheets were just slightly too close together and, much like my 5×7 drying rack, would benefit from the optional hold-downs. The new design implements both of these changes. This would be a 2-sheet version and while I likely will offer a 2-sheet version, is mostly for economy while I’m prototyping designs. I expect to have at least a 4-sheet (and probably a 6-sheet) as a final product option. I’m hoping to test this soonish and finally have this as an official product not too long after!

Posted on

A DSLR Scanning Table for Raleno Lights

Recently I had a nice conversation with a very satisfied customer who purchased my 6×12 scanning table. They mentioned they were using it with the Raleno PLV-S116 video light. I knew of this before as it is an economical, and seemingly high CRI, light panel folks have been using for DSLR scanning already. The customer mentioned the scanning table fit almost perfectly on the light table.

I thought it might be worth checking out to compare to my Kaiser so I picked one up. Right off the bat, it’s MUCH brighter, has a matte surface (less chance of scratching), and has white balance control. Great! Only trouble was, it wouldn’t sit flat on a table with the offset knobs. So I thought, “why not build a holder for the Raleno and then make a scanning table fit on top of that?”

A day and a half later, here’s the first printed prototype!

Raleno stand with the 4×5 base and top, showing one of my Ektar negatives from our trip to Alaska last summer

First, yes, it’s pink. For prototypes I tend to use spare filament and happened to have a lot of shinky pink filament leftover from printing a bunch of Kirby figurines one day. At any rate, the point is the design works really well and a final version will, of course, be printed in opaque black. I’ve already designed a 35mm prototype which I plan on printing tomorrow with 120 to follow shortly after.

I’m not yet sure if this will be a full product yet but the answer is very probably! The Raleno does mean the whole setup is bigger than my 35mm scanning tables, which are meant to be small and compact. So it might not be for everyone but for those that want an fully enclosed solution, it could work really well I think!

If that’s something you’re interested in, certainly reach out! I might be looking for some beta testers!